この記事は「Oracle Cloud その2 Advent Calendar 2018」の12月6日の記事として書かれています。
Oracle Digital Assistant は外部の翻訳サービスを使って翻訳できます。 本例では、Google翻訳を使用して翻訳します。事前に Google Cloud Platform で Google翻訳の Authorization Tokenを取得してください。
Oracle Digital Assistant の設定
画面左上のMenuから Developments - Botsと遷移し、右側のハンバーガーメニュー - Translation Service を選択します。
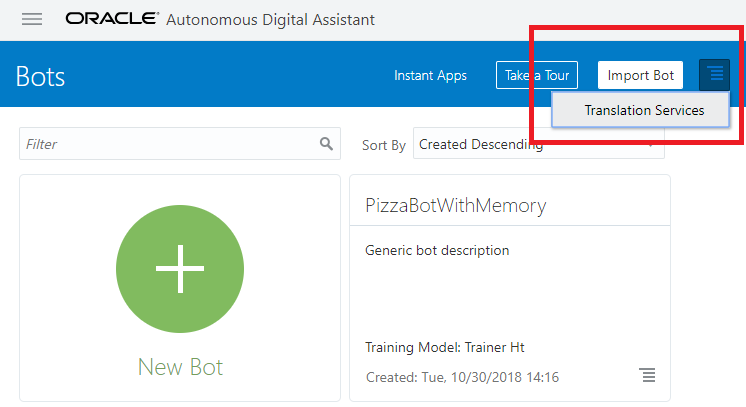
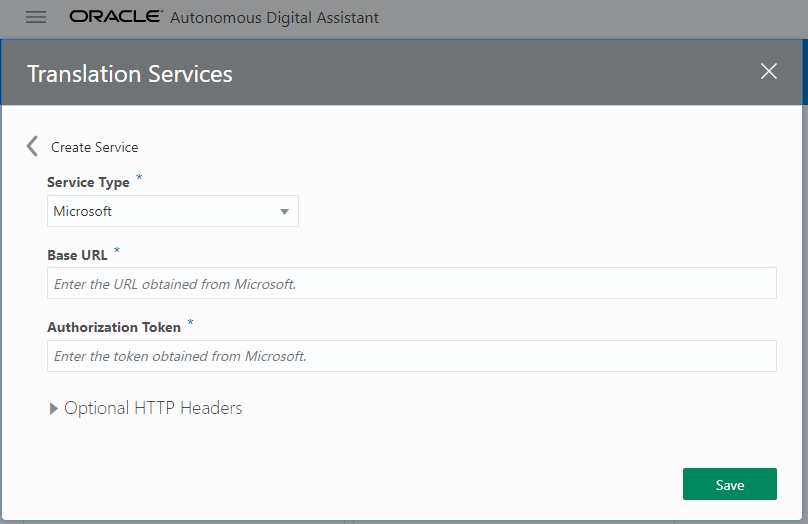
Translation Services のダイアログが表示され、+ Serviceを選択すると以下のような入力画面になります。
次の 3 点を入力します。
- Service Type を Google
- Base URL を
https://translation.googleapis.com/language/translate/v2 - Authorization Token を Google 翻訳から取得した Token
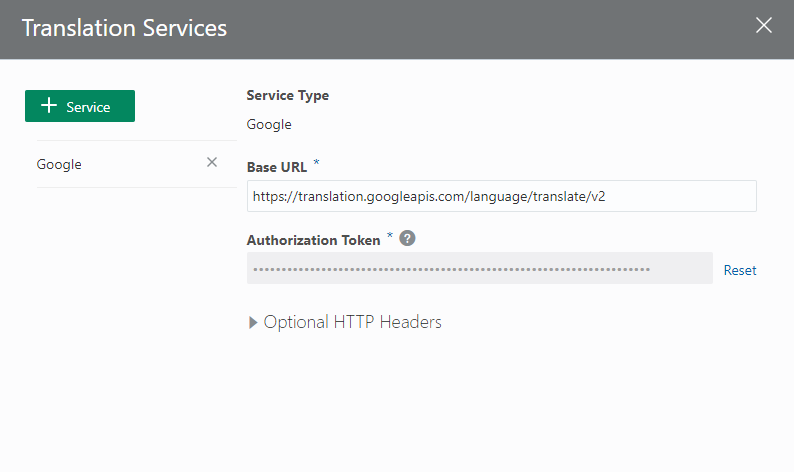
Google 翻訳の情報を入力し、入力が完了すると以下のように表示されます。
チャットボットの個別設定
チャットボットの個別設定は以下の流れになります。
- 使用する翻訳サービスの選択
- 入出力を翻訳サービスへ橋渡しする
使用する翻訳サービスの選択
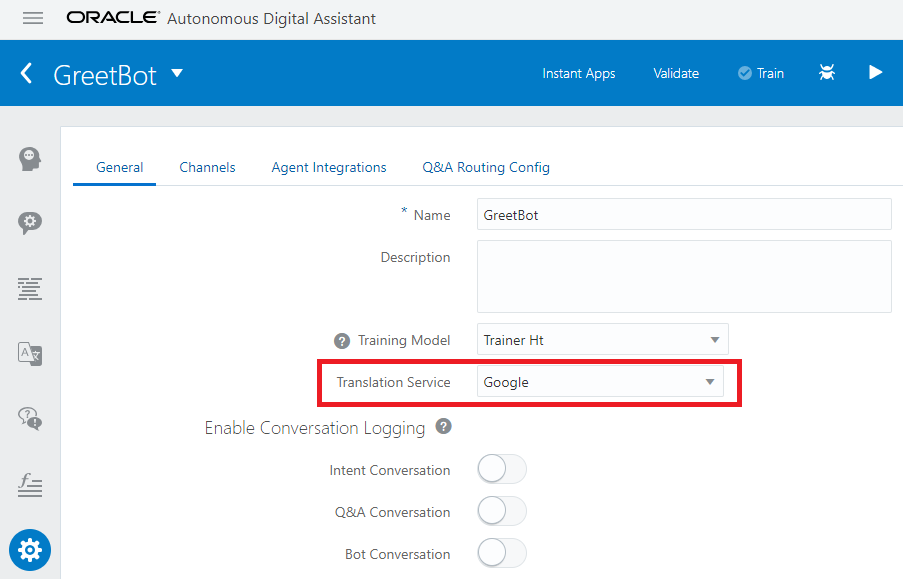
次に翻訳したいチャットボットの画面へ遷移し、SettingsでTranslation Service に Google を選択します。
入出力を翻訳サービスへ橋渡しする
本来はFlows 画面で、+Componentsからコンポーネントを足していきます。
流れが長いので今回はチャットボットのソースコードを以下のように直接追加します。赤枠にあるコードを同じ場所に追加してください。図の下にテキストを記載していますのでコピーするだけで対応可能です。
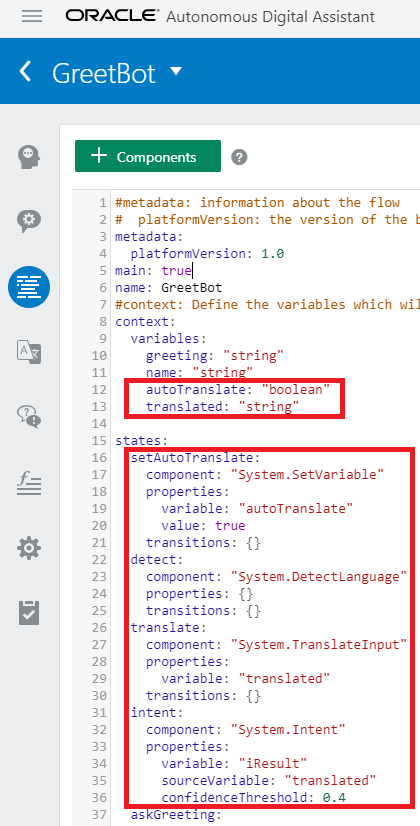
テキストコード
(略)
context:
  variables:
    greeting: "string"
    name: "string"
    autoTranslate: "boolean"
    translated: "string"

states:
  setAutoTranslate:
    component: "System.SetVariable"
    properties:
      variable: "autoTranslate"
      value: true
    transitions: {}
  detect:
    component: "System.DetectLanguage"
    properties: {}
    transitions: {}
  translate:
    component: "System.TranslateInput"
    properties:
      variable: "translated"
    transitions: {}
  intent:
    component: "System.Intent"
    properties:
      variable: "iResult"
      sourceVariable: "translated"
      confidenceThreshold: 0.4
  askGreeting:
(略)
確認
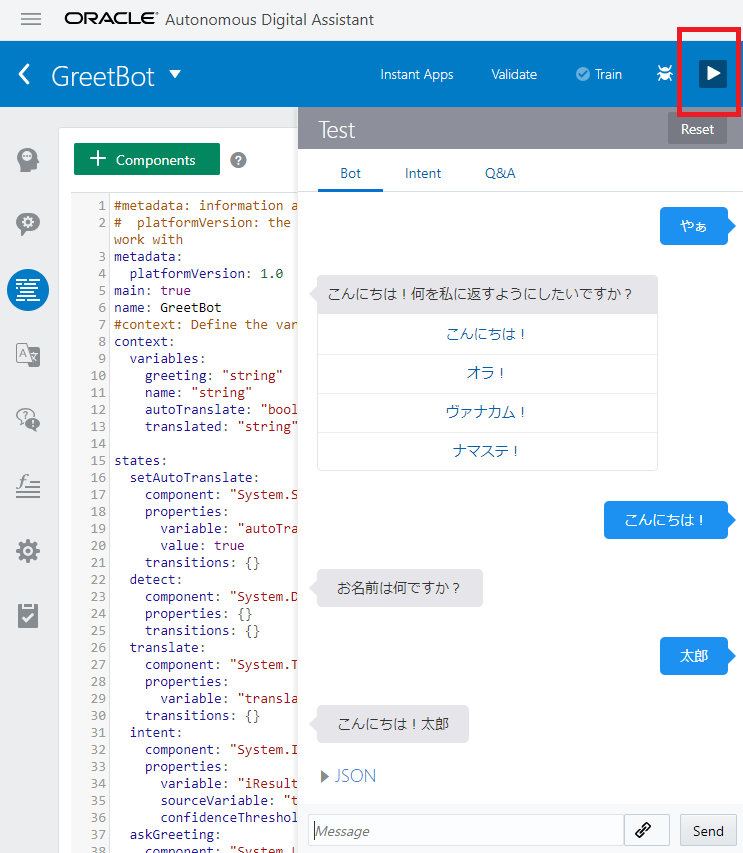
日本語で話しかけてみましょう。
※Google翻訳で英語と日本語を変換しているので、英語では無かった挨拶はちゃんと翻訳されていません・・・Google翻訳の精度向上に期待です。
